Gutenify photography Documentation #
Thank you for using our Gutenify photography Theme. Please read and follow the instructions and If you have any questions that are beyond the scope of this help file, you can submit a ticket
Important Note: Before beginning the installation process, please make sure you are using the latest version of WordPress and the Theme.
Theme Requirements #
Make sure you have the latest version of WordPress installed, by checking the updates tab from your current WordPress dashboard.
If you haven’t downloaded WordPress already, you can download it from the WordPress repository via https://wordpress.org/download/ .
After you have the latest version of WordPress, download the theme ZIP file, and save it somewhere handy on your computer, as you will be using the included files for the rest of the installation process.
Theme Installation #
Step 1 : Upload and Activation #
There are two methods to install Gutenify photography theme. You may either upload the zipped theme file using the WordPress theme installer (Recommended), or you can upload the unzipped theme folder via FTP (Advanced).
Method 1 (Recommended) : Install Using The WordPress Theme Installer # #
Log into your WordPress site and opens the Administration Panel.
- Go to Appearance > Themes in the WordPress Dashboard
- Click on the Add New button.
- Click on the Upload Theme link.
- Click on Choose File, select the gutenify-photography.zip file from your computer and click upload. You can download the zip file from here https://wordpress.org/themes/gutenify-photography/
- Click Install Now
Method 2: Install Using File Transfer Protocol (FTP) #
- Unzip “gutenify-photography.zip” file on your computer.
- Login using FTP client to access your host web server.
- Locate the wp-content folder in your WordPress install files.
- Upload the un-zipped gutenify-photography folder into the: wp-content/themes folder.
For More Information about installing theme using FTP visit :http://codex.wordpress.org/Using_Themes#Adding_New_Themes
Activate the theme #
After successfully installing the required theme, you need to activate your theme. Follow given steps to activate the theme.
- Select the Appearance panel, then Themes.
- You will see the Gutenify photography in the list.
- Click Activate button.
- After clicking in activate button the theme will be activate.
Recommended Plugins #
Theme supports some helpful WordPress plugins to enhance your site. Since, Gutenify – ( Gutenberg Full Site Editing Template Kits – Advanced Blocks ) is deeply integrated in the theme to achieve different layouts, please make sure Gutenify plugin is installed and activated. For other recommended plugins, you should only enable those if you need those for your site. For example, enable WooCommerce only if you are using e-commerce.
To manage plugins, in admin panel, go to Appearance -> Install Plugins.
- Click On Begin activating plugin

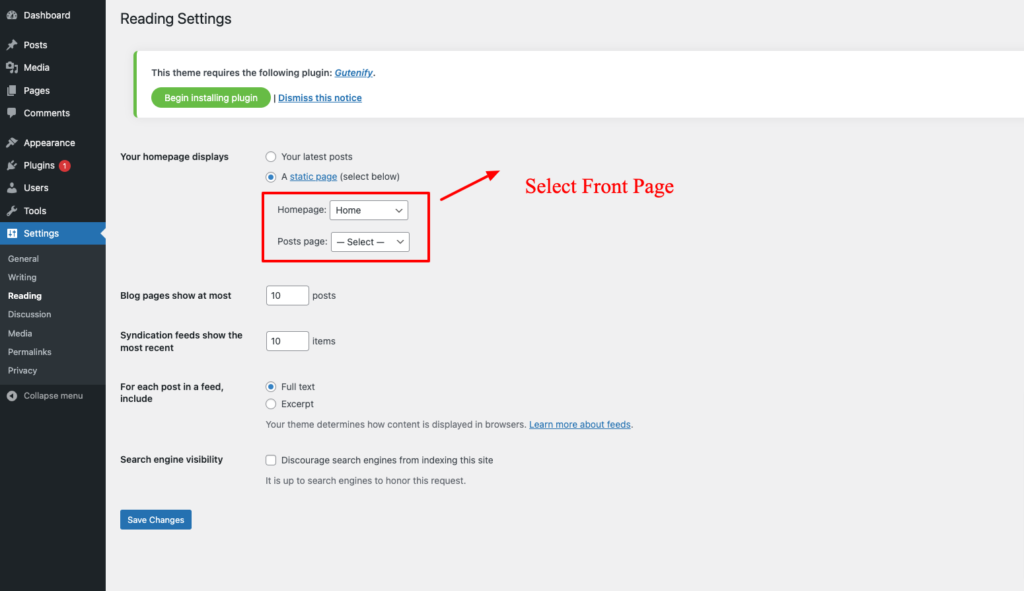
If you used Setup Wizard then you can skip this step as your page should be assigned automatically. Navigate to Settings -> Reading and assign your Homepage from the dropdown list.
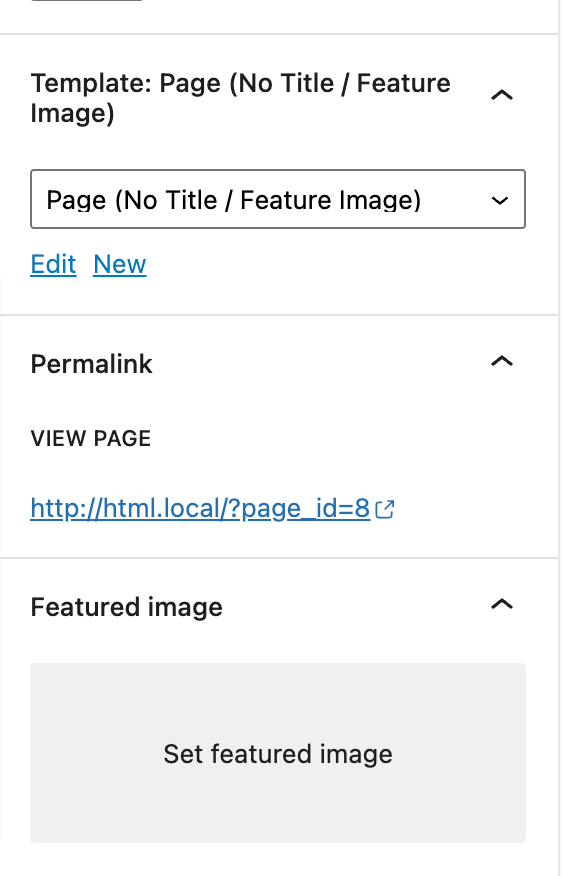
How to use page/post template ? #
The demo is divided into different section as shown in the image below: All the sections is setup using the Block and Template that is bundled within the Gutenberg Blocks by Gutenify.
To set up as in the demo go to Admin panel > Pages > All Pages > Home . In home page edit screen at right side you will see a box Page Attribute . Within Page attribute you will find the option templates . Now chose Page (No Title / Feature Image) Template from the dropdown in the option template and save the page.