This is a pro block and requires activation of Gutenify Pro. Please refer to the Gutenify Pro page for more information.
To view live demo of advance gallery, kindly visit on the provided link. Advance Gallery Demo
Advance Gallery can be the finest choice for you if you’re looking for a simple way to add responsive galleries and albums to your website.
The stunning features that Advance Gallery includes expand on its already robust capabilities.
Websites that want to have comprehensive image galleries with simple navigation should explore using Advance Gallery. This is also useful for blogs and websites that focus on photography.
How to add the Advance Gallery Block? #
So, to add the advance gallery block to your website just go to the WordPress dashboard menu → Posts → Add New.
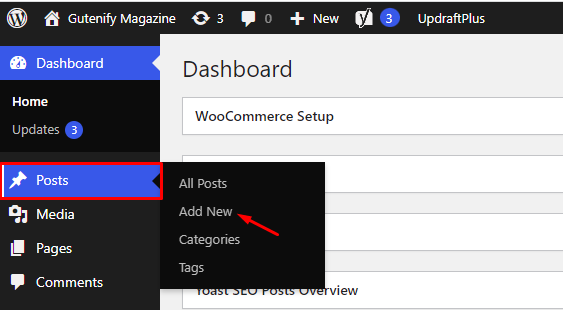
Note: Select the post or pages where you want to add an advance gallery block.
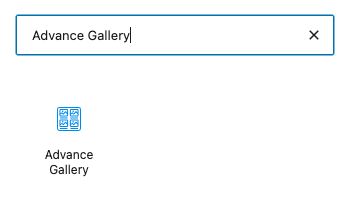
Now, find it with the name in the search option and click on it.
Add albums from your media library if you have otherwise you can upload them from your computer.
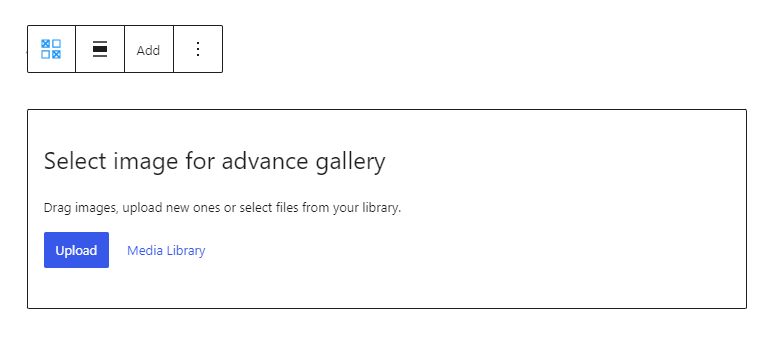
After selecting the images this is how gallery look like:

Content #
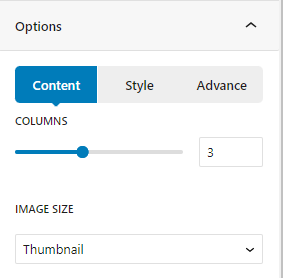
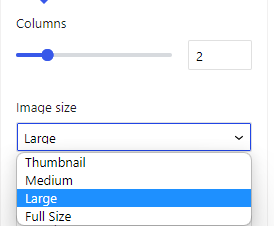
In the content tab, you have options to increase the number of columns and set the image size.
Masonry Feature
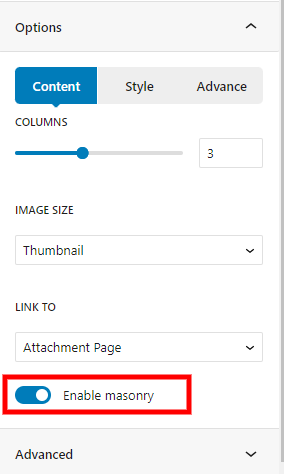
You can show your products in a best way by enabling the masonry feature.
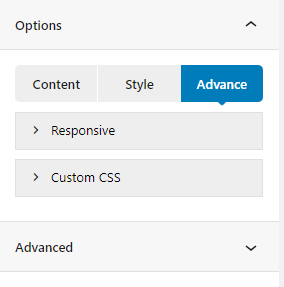
Advance Tab #
In the Advanced tab, Gutenify provides responsive options for giving your widgets extra space and the ability to hide content on smaller devices. Additionally, it offers custom CSS for enhanced website design.
Learn more Here
When you’re satisfied with your post filter block, click “Publish”. Simply repeat the same procedure to add more blocks to your posts or pages.
The user-friendly Gutenify advance gallery block is best for showcasing your post in a neat and polished manner.
It enables you to construct visually appealing images for your website which will boost conversions. Advance gallery can be shown on sites, blogs, custom templates, and more.


