Have you ever tried out something new like a new plugin or code snippet? After that, unfortunately, you didn’t find anything except a blank page.
Then a staging site for WordPress is the best solution for this problem.
I am sure you don’t want to take any risks during operating your WordPress site. Trying out every new thing on your staging site will erase the risk that you might face.
In this blog, we will share the easiest way to create a staging site.
What is a WordPress Staging Site and why do you need it?
A staging site is a carbon copy of your WordPress site Where you can test out various plugins, themes, updates, code snippets, and many more without being scared of breaking your live site.
Besides, you don’t need to worry about bugs or threats that your new tryout can cause. Understanding how to keep WordPress secure is crucial when working with staging and live environments.
The WordPress staging site is essential for all WordPress website owners.
You will need it if you own even a small random website as you don’t want to take risks during operating your site. Because of the following importance, you should own one:
- You don’t have to be worried before trying out any plugins, updates, or code snippets.
- Website of yours will be protected from all threats and bugs.
- Your customers will not be able to see any changes that you made on your staging WordPress site.
- You can make new changes as trying out new plugins, code snippets will be easier. After testing then you can use it on your live WordPress site. Moreover, you can easily migrate WordPress staging to production.
Steps to Create a Staging Site for WordPress
Follow the following steps to create a Staging Site for WordPress:
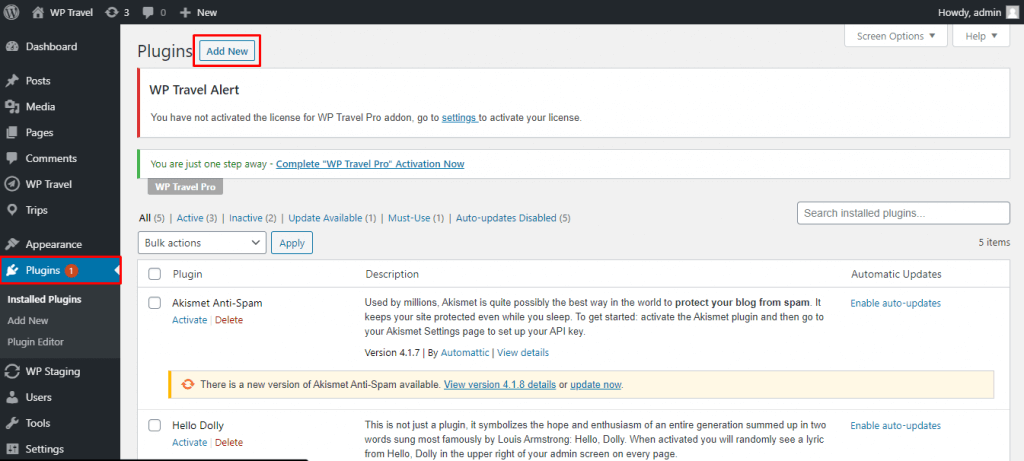
1. Install the Plugin to create the staging environment
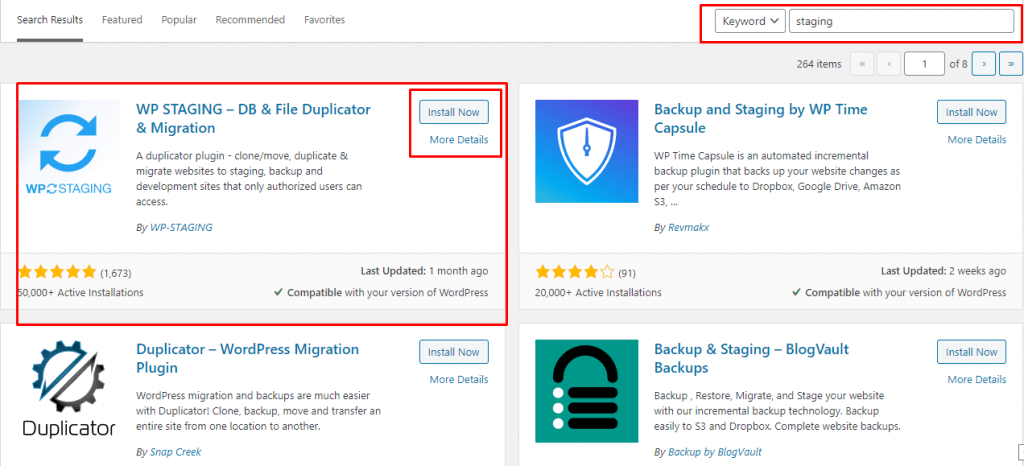
You can use different plugins to create a WP staging site. For example WP staging plugin, WP staging pro, etc.
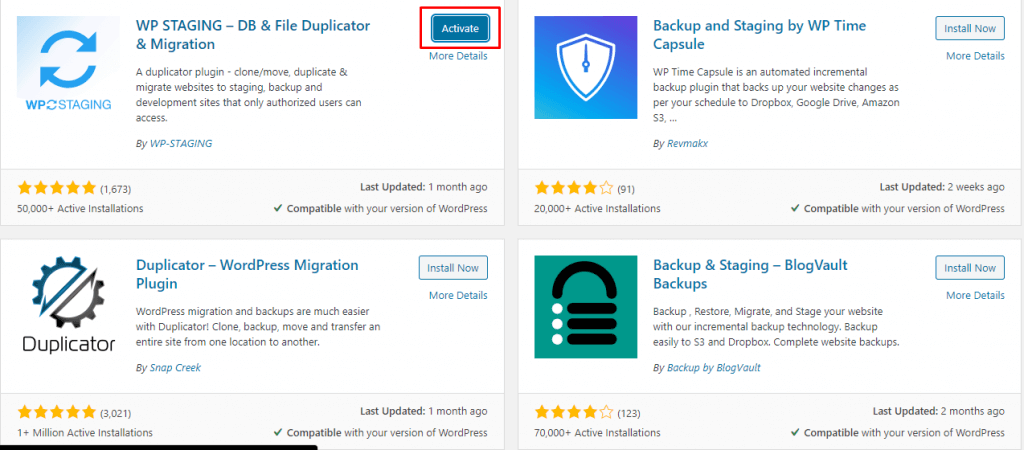
First, Go to Plugins → Add New on your WordPress backend for creating a staging WordPress site.
After that, look for ‘staging’ in the Search box and click on the ‘Install Now button as shown below:
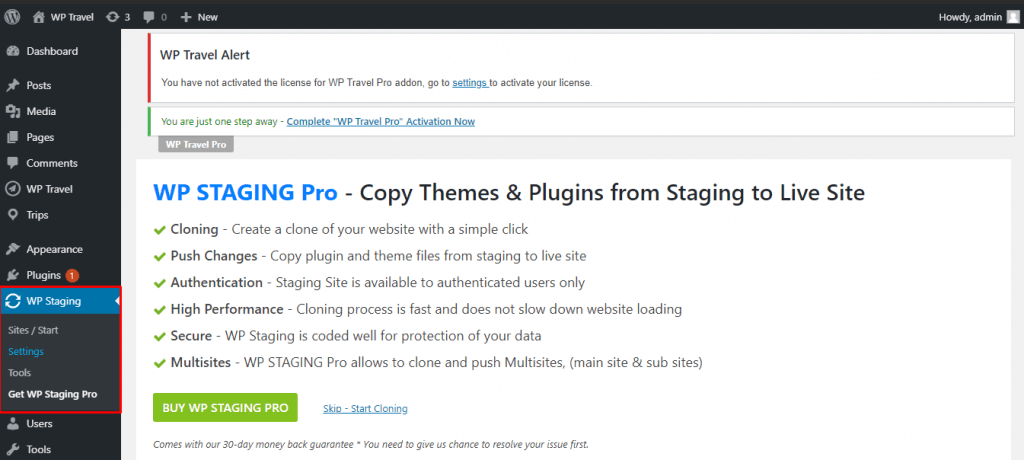
2. Activate the plugin
3. Go to WP Staging on your dashboard
There are four tabs (Sites/Start, Setting, Tools, and Get WP Staging Pro) available on WP staging as shown the following:
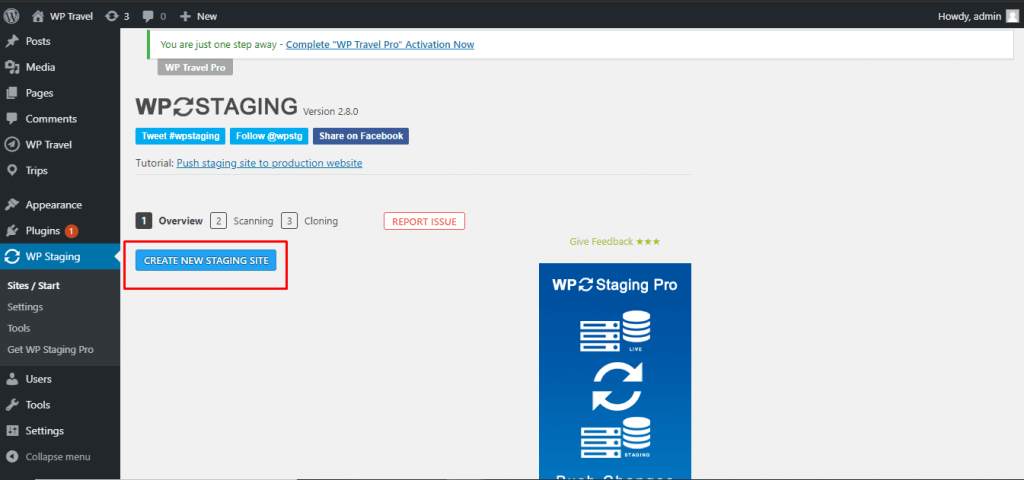
4. Create Staging Sites
To create your WordPress staging site, Click WP Staging → Sites/Start in your admin menu. After that, click the ‘Create New Staging Site‘ button as shown below:
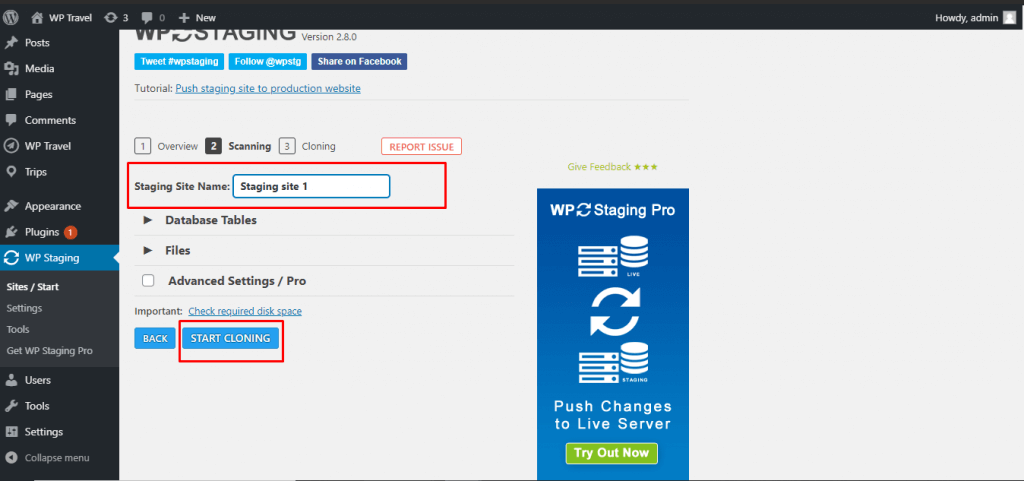
5. Start cloning your sites
After clicking Sites/Start options, it will take some seconds then you will get the option to add a staging site name and choose the files that you will want to clone. Then, click the ‘Start Cloning‘ button.
6. Accessing your staging site
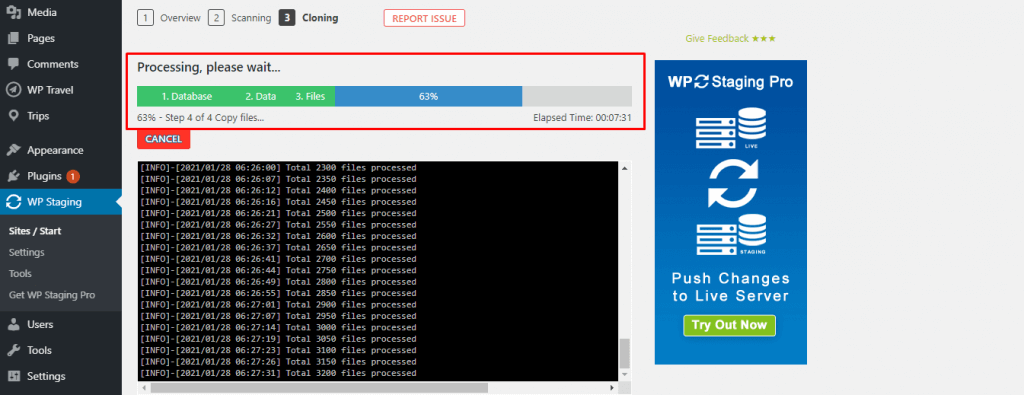
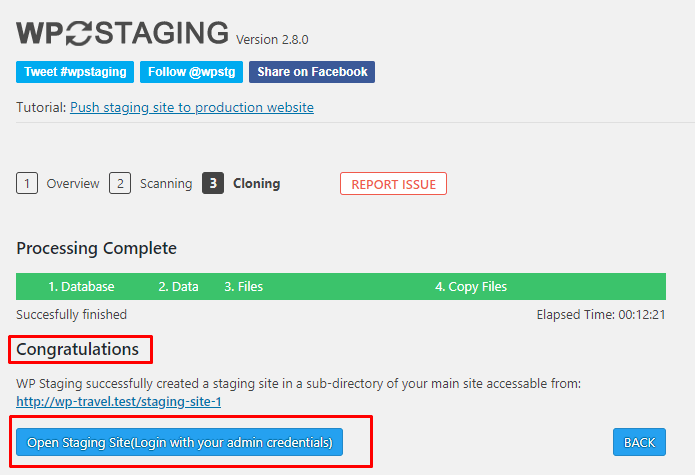
For cloning, it will take time to process. After that, you can open your staging environment when the cloning is completed.
Click the ‘Open staging site‘ button to access the staging site.
Then, you can log in to staging sites using the same credentials that you use for your main website.
7. Start Testing
Finally, the Your WordPress staging site is ready for testing. The dashboard of the staging site looks the same as your main site.